


How to Install JLCONE on Mac (Intel & Apple)
 View
View
Hello macOS users!
We know many of you create, design, and manage projects on Mac—so we've made sure JLCONE runs smoothly on both Intel and Apple Silicon (ARM) Macs. Here's a quick guide to get started:
Step 1: Download the JLCONE App
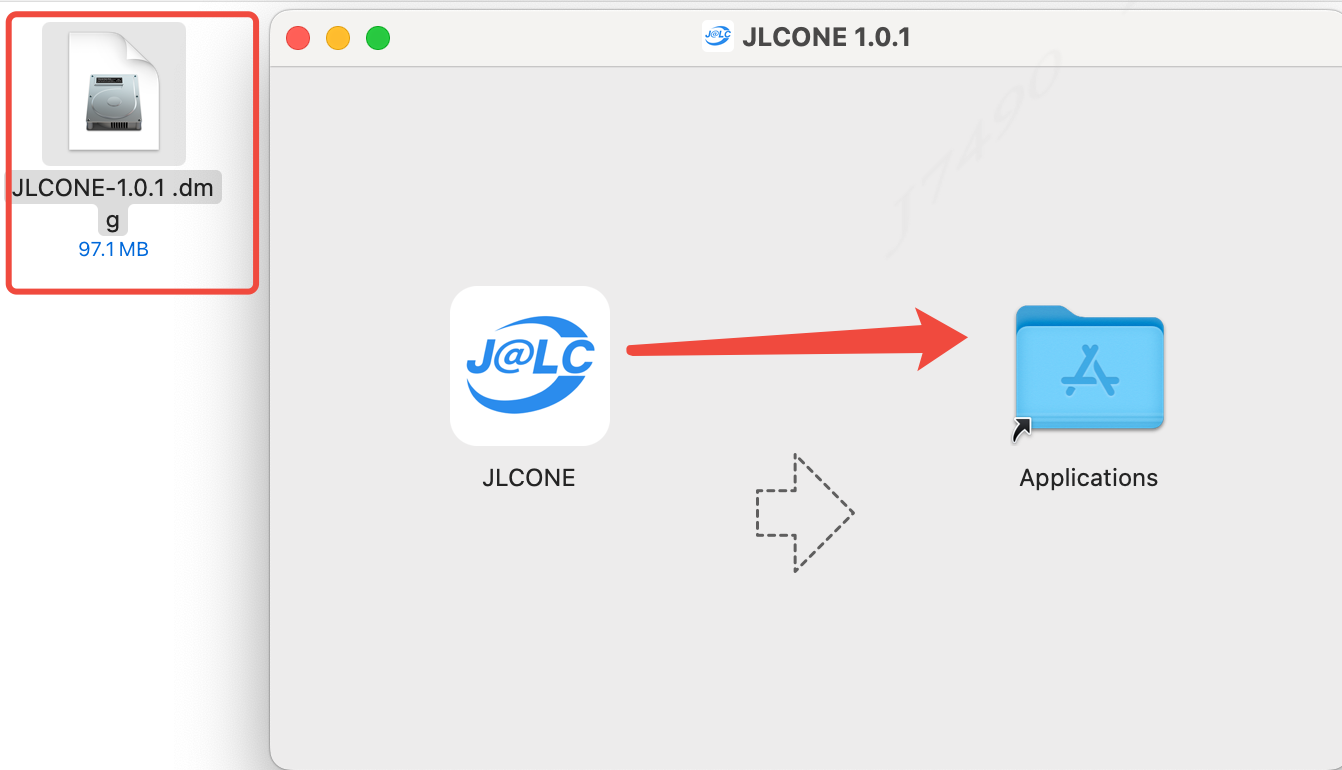
- Download the installation package (.dmg or .pkg) from the JLCONE download page.

- Double-click the downloaded file, then drag the app into the Applications folder.
Step 2: First Launch
-
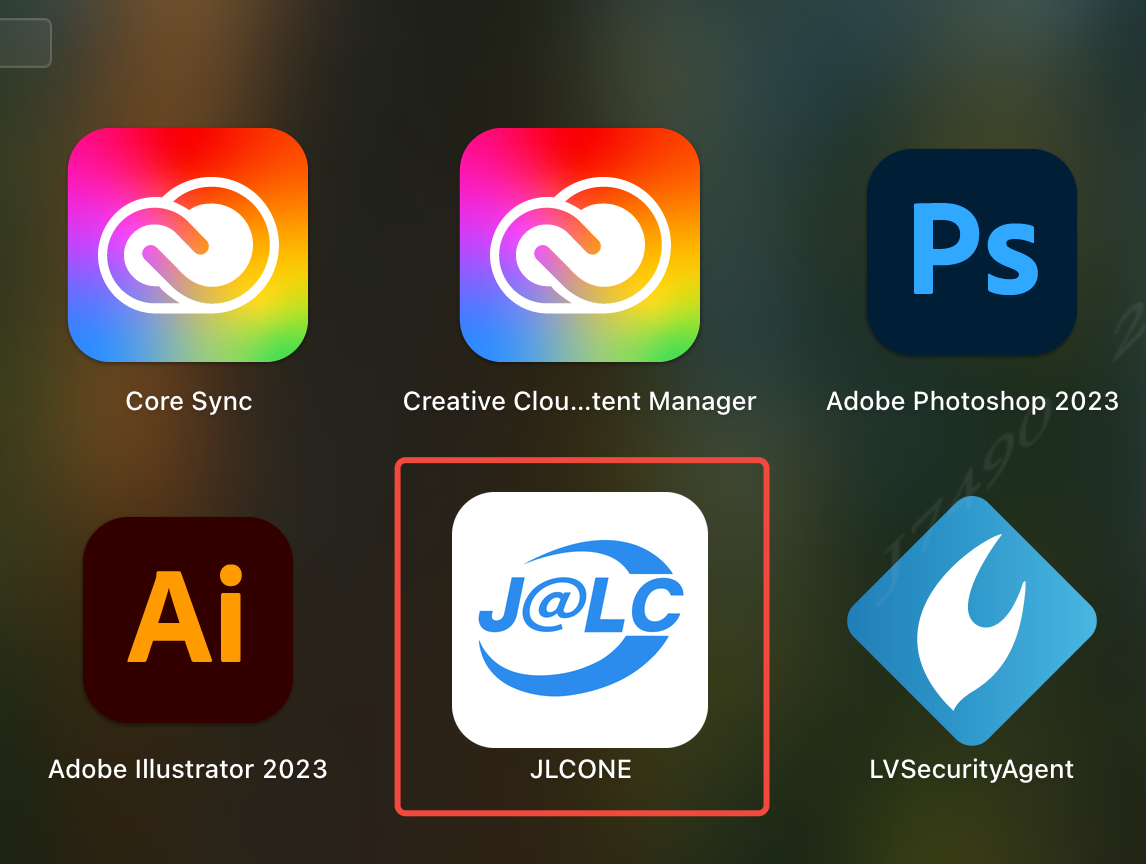
Open the Applications folder and double-click the JLCONE app icon.
-
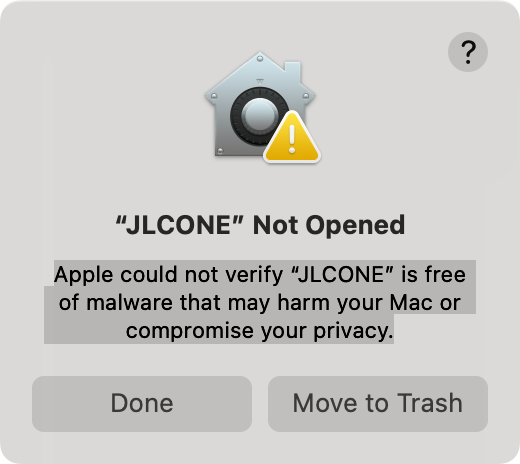
You may see the message: Apple cannot verify that "JLCONE" is free of malware that may harm your Mac or compromise your privacy.
Click "Done" to proceed.
Step 3: Allow the Installation
-
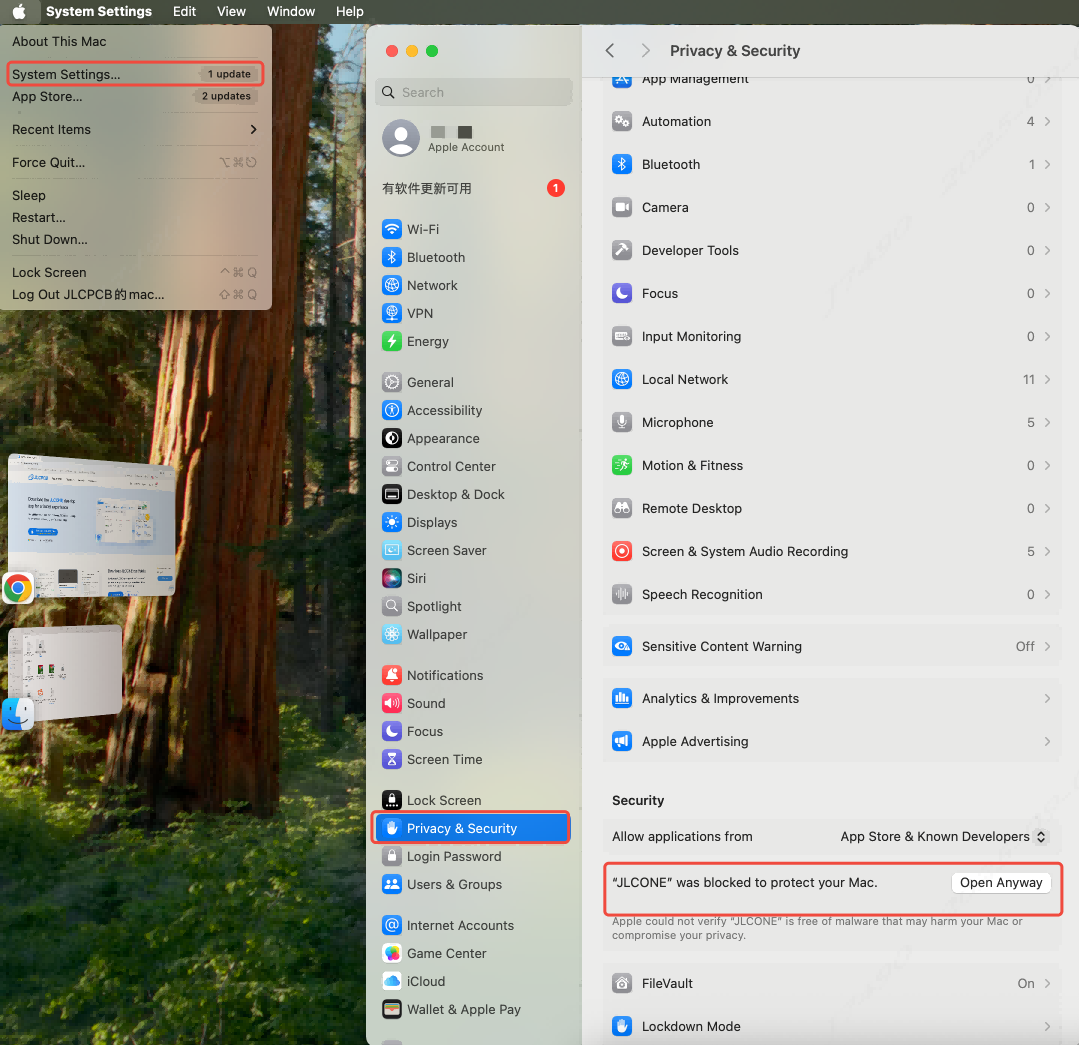
Click Apple menu > System Settings (macOS Ventura or later).
-
Go to Privacy & Security.
-
Scroll down to the message: "JLCONE" was blocked to protect your Mac.
-
Click Open Anyway.
Step 4: Reopen the App
Return to Applications and double-click JLCONE to launch it.

Why use JLCONE on Mac?
- Stay logged in between sessions
- Order PCBs, 3D prints, or mechanical parts without switching tabs
- Real-time order tracking from your dock
- Desktop notifications for order updates (coming soon!)
Having trouble with installation? Reply here or reach out to our support team—we're happy to help.
Download JLCONE for macOS here: Learn More & Download Here
Sign In Or Register Comment after
No comments yet. Be the first to comment!